Effortless Creamy Chocolate Oreo Pie: Your No-Oven Dessert Dream Come True
Imagine a dessert so rich, so creamy, and so utterly satisfying that it melts in your mouth, yet requires absolutely no baking. Enter the majestic
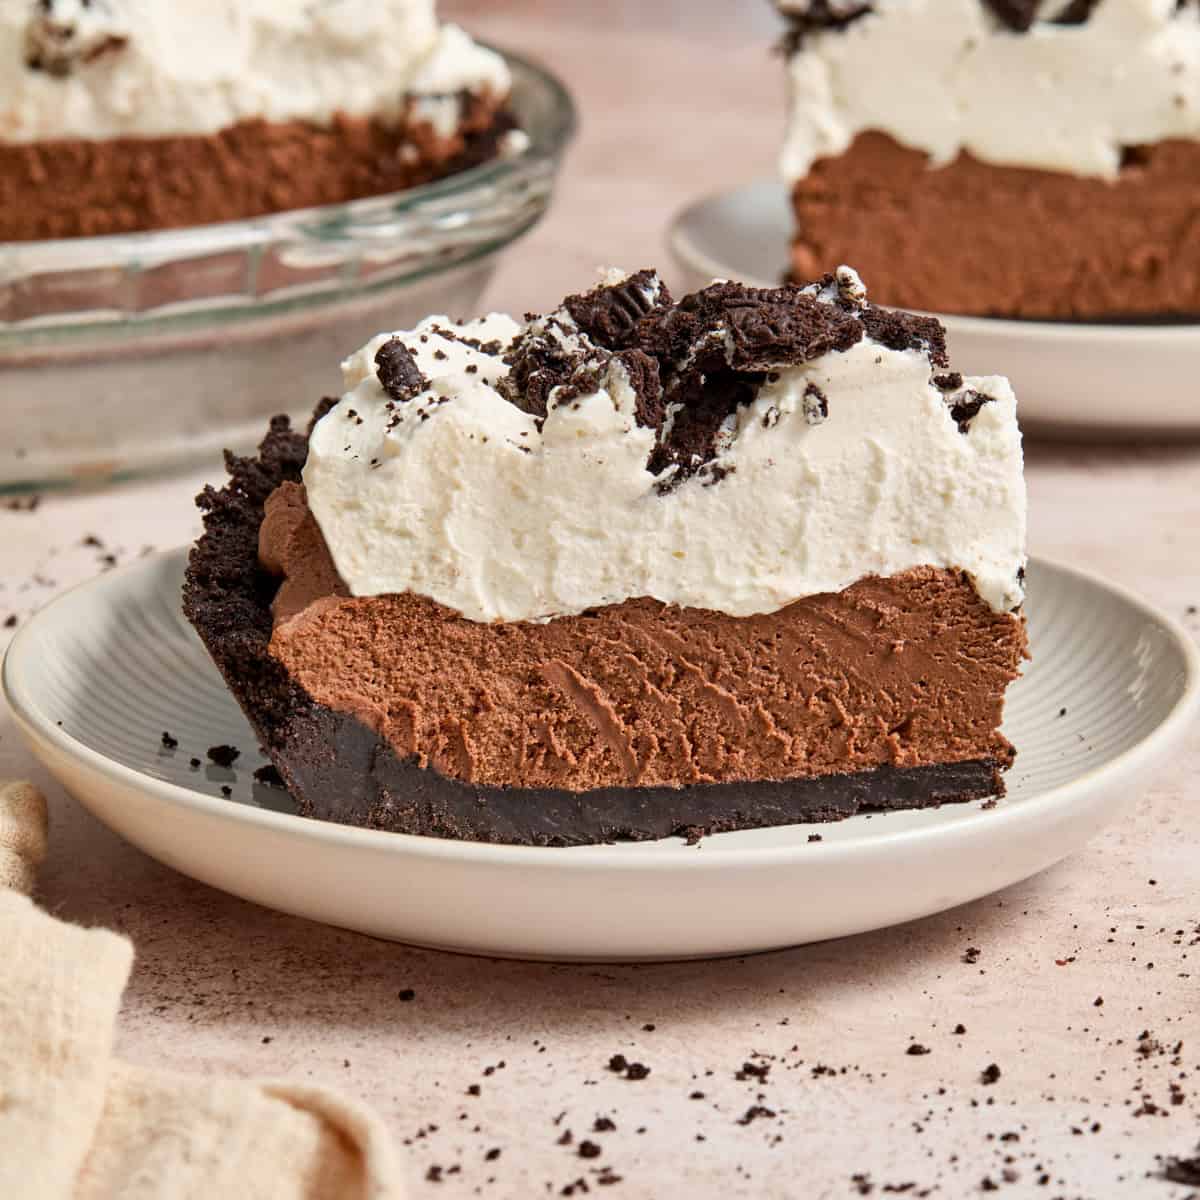
no bake chocolate Oreo pie. This isn't just a dessert; it's a game-changer for chocolate lovers, busy hosts, and anyone who craaks an indulgent treat without the fuss of firing up the oven. Combining a crunchy, buttery Oreo crust with a decadent, smooth chocolate filling, this pie delivers double the chocolate delight in every single bite. It's the ultimate stress-free dessert, perfect for any occasion from casual weeknights to festive holiday gatherings.
Why This No Bake Chocolate Oreo Pie is Your New Go-To Dessert
The allure of a no-bake dessert, especially one as luxurious as a chocolate Oreo pie, is undeniable. In a world where time is a precious commodity, the ability to whip up an impressive dessert without complicated steps or lengthy baking times is a true blessing.
*
Unrivaled Convenience: The most obvious benefit is right in the name:
no oven needed. This makes it an ideal choice for hot summer days when you want to avoid heating up your kitchen, or for holidays when your oven is already packed with savory dishes. Just a few simple ingredients, a little mixing, and some chill time in the fridge are all it takes.
*
Irresistible Flavor & Texture Profile: This pie is a symphony of textures and tastes. You get the delightful crunch and distinct chocolatey flavor of the Oreo cookie crust, perfectly balanced by a filling that's akin to a creamy chocolate mousse. It's rich without being overly heavy, and smooth with just the right amount of decadent intensity. For those who believe there's no such thing as too much chocolate, this pie truly doubles down on the goodness, infusing both the crust and the filling with deep cocoa notes.
*
Effortless Elegance: Despite its simplicity, the final presentation of a well-chilled
no bake chocolate Oreo pie is nothing short of elegant. It slices beautifully, revealing distinct layers of dark crust and creamy filling, making it a showstopper at any table. It's proof that you don't need to spend hours in the kitchen to create something truly spectacular.
*
A Make-Ahead Marvel: This dessert is a dream for meal prep or party planning. Because it requires several hours of chilling to set, you can easily prepare it a day or even two in advance. This frees up your precious time on the day of your event, allowing you to focus on other preparations or simply relax and enjoy the moment.
Crafting the Perfect No Bake Chocolate Oreo Pie Crust
While a store-bought Oreo crust offers a convenient shortcut, making your own provides an unparalleled depth of flavor and texture that elevates this pie from great to unforgettable. The process is incredibly simple and takes mere minutes.
Ingredients for Your Homemade Crust:
* About 30-35 Oreo cookies (the entire cookie, cream filling included)
* 6-8 tablespoons of melted unsalted butter
Steps to a Superb Crust:
1.
Crush Your Oreos: The key to a fantastic crust is finely crushed Oreos. You can achieve this using a food processor for the quickest and most consistent results. Pulse until the cookies resemble fine, uniform crumbs. If you don't have a food processor, place the Oreos in a sturdy zip-top bag and crush them with a rolling pin or the bottom of a heavy glass. Ensure there are no large chunks remaining.
2.
Combine with Butter: Pour the melted butter over the Oreo crumbs. Mix thoroughly until all the crumbs are moistened. The mixture should resemble wet sand and hold together when pressed.
3.
Press into Pie Plate: Transfer the mixture to a 9-inch pie plate. Using the bottom of a flat glass or your fingers, firmly and evenly press the crumbs into the bottom and up the sides of the pie plate. The firmer you press, the less likely your crust is to crumble when sliced.
4.
Chill to Set: Place the prepared crust in the refrigerator for at least 30 minutes to an hour. This chilling time is crucial as it allows the butter to solidify, binding the crumbs together and creating a firm foundation for your creamy filling.
Pro Tip: For an extra rich crust, you can add a tablespoon of cocoa powder to the crushed Oreos before adding the butter. This intensifies the chocolate flavor even further!
The Secret to a Decadent, Velvety Chocolate Filling
The filling is where the magic truly happens, transforming simple ingredients into a rich, cloud-like chocolate experience. The goal is a texture that's both substantial and delightfully airy, offering a luxurious mouthfeel that complements the crunchy crust. If you're looking for even more depth on achieving that perfectly rich and creamy texture, check out our guide on
Easy No-Bake Chocolate Oreo Pie: Rich & Creamy.
Core Ingredients for the Filling:
* High-quality chocolate (chips, bars, or even a blend)
* Heavy whipping cream OR frozen whipped topping (like Cool Whip)
* Optional: a touch of powdered sugar and vanilla extract for homemade whipped cream, or a tablespoon of cocoa powder for deeper flavor.
Crafting the Perfect Filling:
1.
Melt the Chocolate: This step is critical for a smooth filling. You can use a double boiler method (placing a heatproof bowl over a pot of simmering water, ensuring the bowl doesn't touch the water) or microwave the chocolate in 30-second intervals, stirring well after each, until completely smooth and melted. Use good quality chocolate for the best flavor – semi-sweet or dark chocolate chips work wonderfully, but a chopped chocolate bar will yield an even silkier result.
2.
Prepare the Whipped Cream: If using frozen whipped topping, simply let it thaw in the refrigerator until soft. If making fresh whipped cream, beat cold heavy cream with a stand mixer or hand mixer on high speed. Add a tablespoon or two of powdered sugar and a dash of vanilla extract once the cream starts to thicken. Continue beating until *stiff peaks* form. This means when you lift the beaters, the cream stands up firmly. This is a "major key" to achieving that light, fluffy, yet stable texture for your pie.
3.
Fold with Care: Once your chocolate is melted and slightly cooled (it should still be liquid but not hot), gently fold it into the whipped cream or thawed whipped topping. The key word here is *fold* – use a spatula to carefully combine the mixtures, lifting from the bottom and turning over, to maintain the airiness of the whipped cream. Avoid overmixing, which can deflate the cream and result in a dense filling. If you desire a more intense chocolate flavor, this is also the stage to gently fold in a tablespoon of unsweetened cocoa powder.
4.
Fill the Crust: Pour the luscious chocolate filling into your chilled Oreo crust. Use a spatula to smooth the top evenly.
5.
The Final Chill: Return the pie to the refrigerator for at least 4-6 hours, or ideally overnight. This extended chilling time is essential for the pie to fully set and achieve that perfect sliceable consistency. Don't rush this step!
Customization & Serving Ideas for Your No Bake Chocolate Oreo Pie
While this classic
no bake chocolate Oreo pie is a star on its own, its versatility allows for endless customization, transforming it into a unique treat every time.
*
Crust Adventures: While Oreos are supreme, don't shy away from experimenting! Graham cracker crumbs offer a less intense chocolate base, while other crushed cookies like Biscoff, Nilla Wafers, or even thin mints can create exciting flavor combinations.
*
Filling Twists:
*
Nutella Swirl: Fold in a few tablespoons of Nutella with the melted chocolate for a hazelnut-chocolate fusion.
*
Peanut Butter Dream: Replace half the melted chocolate with creamy peanut butter for a Reese's-inspired delight.
*
Espresso Boost: Dissolve a teaspoon of instant espresso powder in a tablespoon of hot water and add it to the melted chocolate for a deeper, more sophisticated flavor profile.
*
Minty Fresh: Add a few drops of peppermint extract to the filling for a refreshing twist, perfect for the holidays.
*
Topping Extravaganza: This is where you can truly let your creativity shine!
*
Classic: A generous dollop of fresh whipped cream, chocolate shavings, and a sprinkle of crushed Oreo crumbs.
*
Fruity: Fresh raspberries, strawberries, or cherries provide a lovely tart contrast to the rich chocolate.
*
Caramel Drizzle: A swirl of salted caramel sauce adds another layer of sweetness and sophistication.
*
Nutty Crunch: Chopped toasted pecans, walnuts, or almonds for added texture and flavor.
*
Ice Cream Bliss: Serve slices with a scoop of vanilla bean or coffee ice cream for an ultimate dessert experience.
For those eager to explore the pinnacle of chocolatey, no-bake creations, our article on
Ultimate Double Chocolate Oreo Pie: No-Bake Perfection offers even more advanced tips and variations.
In conclusion, the
no bake chocolate Oreo pie stands as a testament to the fact that simplicity can lead to extraordinary results. It's a rich, creamy, and undeniably satisfying dessert that demands minimal effort but delivers maximum impact. Whether you're a seasoned baker looking for an easy win or a complete novice stepping into the world of desserts, this pie promises a delicious journey from start to finish. So, gather your ingredients, clear some space in your fridge, and prepare to create a chocolate masterpiece that will have everyone asking for seconds – and probably the recipe too!